THE CHALLENGE
In these tutorials, you will learn and understand the tools and interface to create models for gaming, animation and VFX.
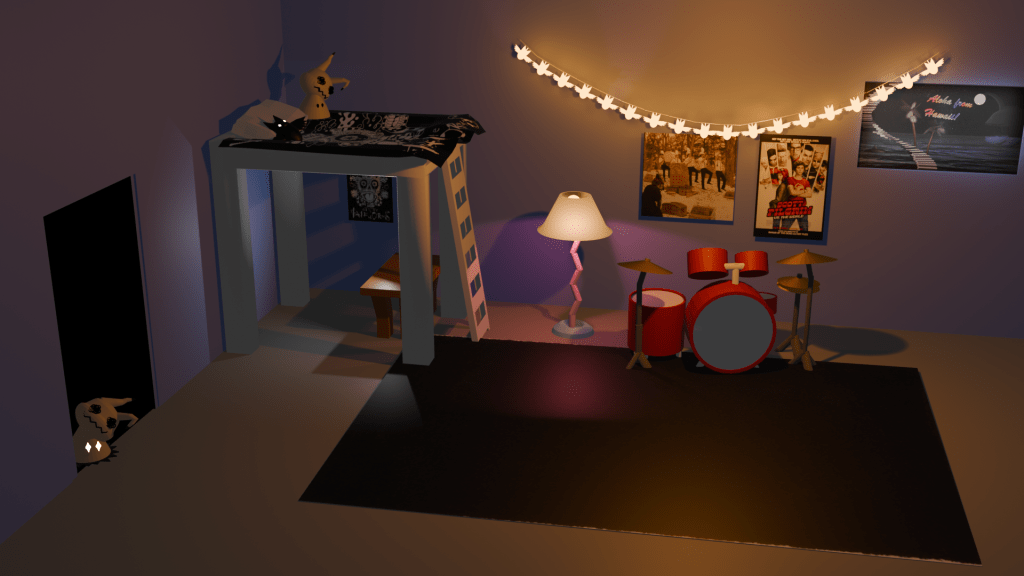
Have a look at the example below showing what the final project will look like.
STUDENT EXAMPLES FINAL RENDERS
BEFORE YOU START…:
In this project setup, you will use blender for the purposes of asset creation, in order to print on a 3D Printer. Please note, that the default project setup of the grid does not need to be changed should you be working in Meters.
TUTORIALS (MODELLING):
LESSON 001: SCENE & OBJECT MANIPULATION
In this lesson, you will be able to use the mouse functions to move around in blender. This is called ZOOM & PAN functions. The second part of this lesson is to show you how to easily manipulate the objects through SCALE ROTATE & MOVE. The third part of this lesson will allow you to create a skyscraper scene using basic objects.
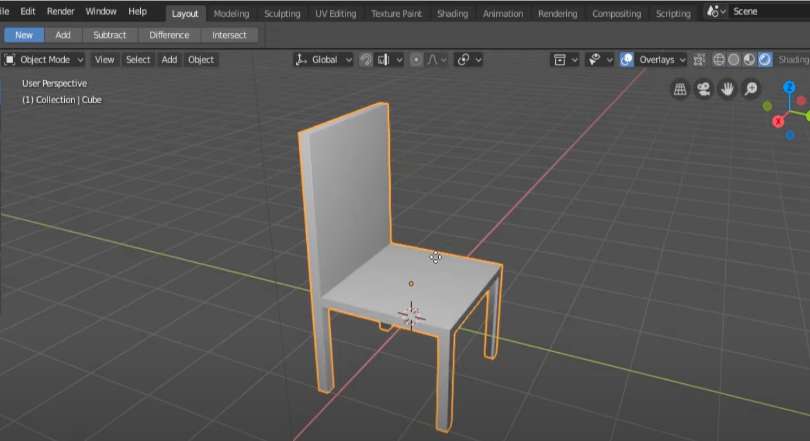
LESSON 002: MODELLING A TABLE
In this lesson, you will learn the loop cut, extrude, and bevel tools to create your first model; A TABLE.
NOW that you have finished modelling a TABLE, use the similar tools from the skills you learned to create yourself a CHAIR.
LESSON 003: MODELLING A POTTED PLANT USING INSET TOOL
BELOW are 4 pots. Please model them using the new instruction on the INSET TOOL in blender.
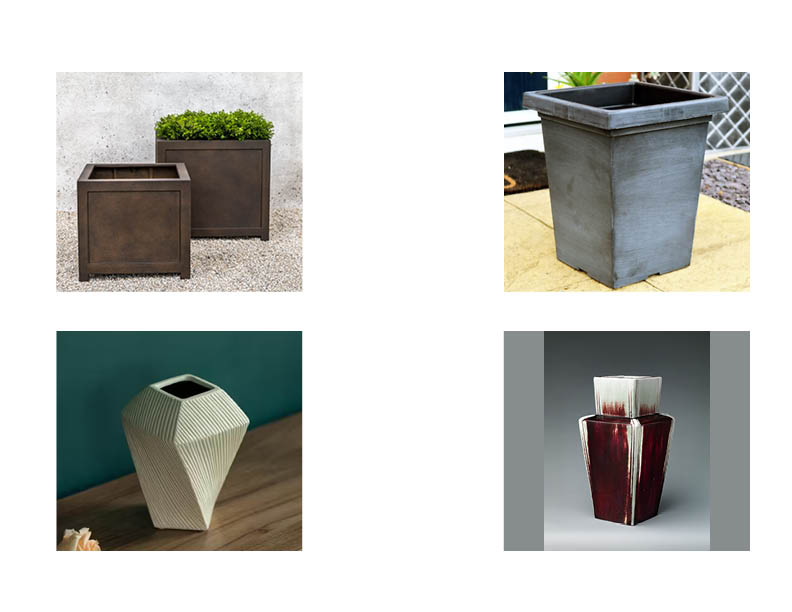
WATCH THE VIDEO BELOW ON USING THE INSET TOOL
LESSON 004: MODELLING A BRIDGE
In this tutorial, I will go through the process of making a bridge. You will learn how to utilize the edit mode function more in depth to be able to model a really nice bridge using the extrude and loop tool functions. You will also gain a good understanding and concepts of how to be able to use the various views to finesse your bridge with anchors.
LESSON 005: MODELLING A LANTERN
In this tutorial, Mr. Balian will go through the process of making a Lantern. In this tutorial you will learn how to model the lantern as well as LIGHT IT UP !!! Lets get “LIT” in this tutorial.
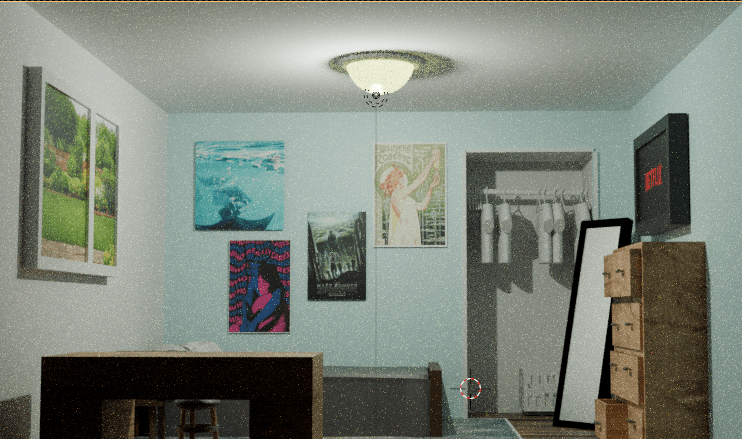
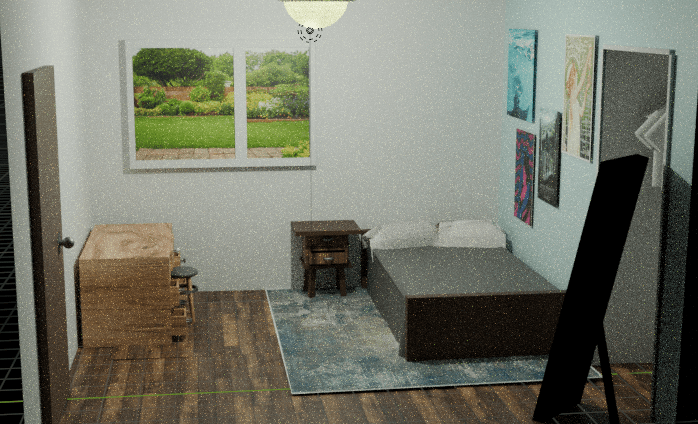
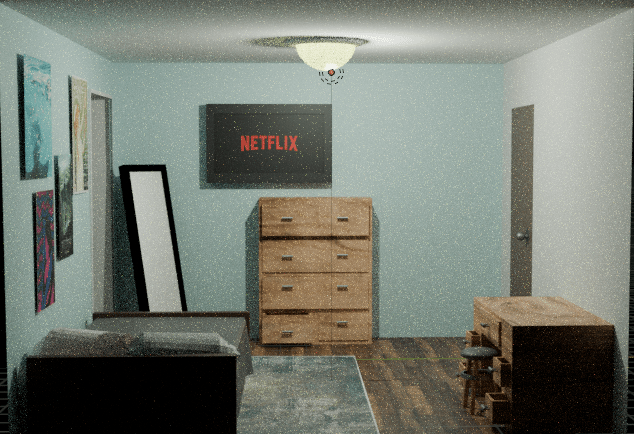
ASSIGNMENT 001: ROOM ASSEMBLY:
Create several pieces for a room. Examples are: chair, table, computer; look around your room to find things. Now once you have modelled the room parts, assemble the room with two walls and a floor. See the screenshot below to view what you should have:

LESSON 006: RENDERING YOUR SCENE
Using the tutorial below, please render out your scene or object. Save the image as a PICTURE only. Below is a video on how to make this happen.
SUBMISSION
Must submit a slideshow with all your screenshots. Please view the examples at the top of the page. Below is the breakdown of the slideshow.
MUST HAVE’s
- Must have a title on all your slides – Lesson 01, Lesson 02, etc…
- Must have one screenshot at least on each slide
- Must have a title slide and an ending slide
- Must have a flat shader on everything (grey)
- Must have all required elements of the slide show below
SLIDESHOW BREAKDOWN
Slide 01: Must have your name and the title “LEARN TO BLEND”
Slide 02: Screenshot of LESSON 01 “Skyscraper Scene” – Title “Skyscraper Scene.
- Must Have at least 10 buildings.
- Must Have all buildings with varied heights.
Slide 03: Screenshot of LESSON 02 – the table
- Must Have four legs
- Must Have a rectangle top
- Must Have demonstrated “Extrude and loop cuts.”
Slide 04: Screenshot of a Chair – You can include a whole set of a table and chair.
- Must Have four legs
- Must Have a seat, and back rest.
- Must Have demonstrated “Extrude and loop cuts.”
Slide 05: Screenshot of LESSON 03 – POTTED PLANTS
- Must have three pots completed accurately.
Slide 06: Screenshot of LESSON 04 – The Bridge
- Must Have started with a cylinder
- Must Have a barrier
- Must Have demonstrated “Extrude and loop cuts along normals.”
Slide 07: Screenshot of LESSON 05 – The Lamp
- Must Have a four plane shape.
- Must Have demonstrated “Extrude, Loop Cuts, and Inset Faces.”
Slide 08: Screenshot of Assignment 001 – ROOM ASSEMBLY –
- If working with a partner, you must include three items you made along with your partners three items in the room assembly.
- If working by yourself, you must create 4 items for your room.
- You must have a bed in your room.
Slide 09: A brief reflection about difficulties that you encountered, what you could do differently, what went well and what could have been improved. Also provide an overall Mark out of 100% that you would give yourself.
