THE CHALLENGE
There are 6 lessons in total. Here students will be able to use photoshop tools sequentially during each lesson to be able to learn the capabilities of photoshop. The first three lessons are easy to complete and will provide a basic understanding of photoshop.
DELIVERABLES:
- For each exercise/ module, please submit your PSD file and a PNG of your image.
- Follow proper naming convention: LAST NAME – FIRST NAME – MODULE-000
MODULES 1 – 3 (EASY)
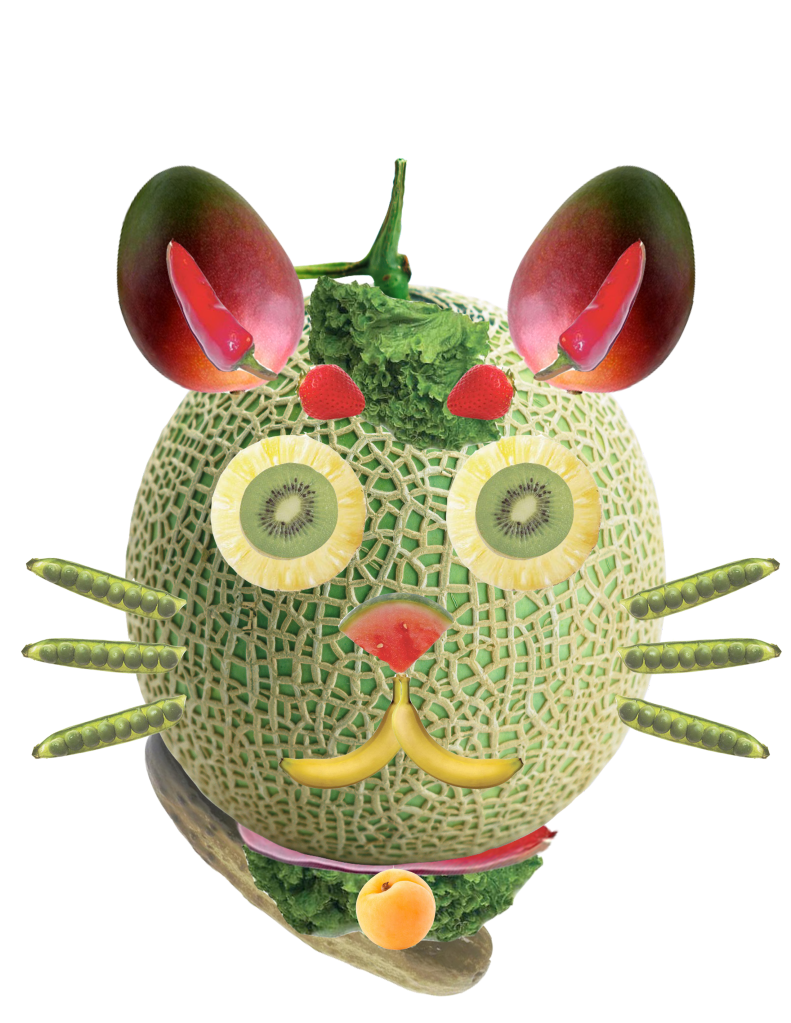
MODULE 01: MELON HEAD
In this lesson, Students will create a MELON HEAD. A melon is provided, and all the corresponding vegetarian options. Click the buttons below to download the corresponding files. Included is a PDF for your helpful guide. Included is a video tutorial for your benefit.
VIDEO TUTORIAL:
MODULE 02: CUT IT OUT
Here in this lesson, students will use the lasso selection tool to cut out the image and separate the background from the foreground. They will then do a background replacement. Here they will also learn how to complete a shadow for their character and color grading to match the scene.
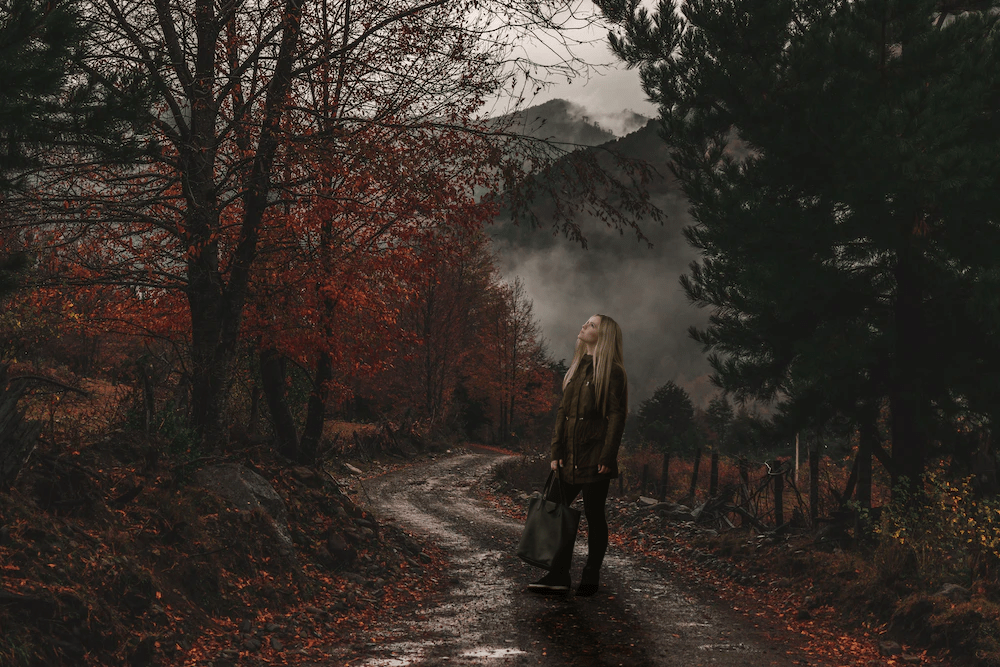
Above you can see the example!
VIDEO TUTORIAL:
MODULE 03: BLEND IT TOGETHER
In this tutorial, you will be using all tools from the previous lessons to create a fiction based image of a character coming out of a puddle on the road.
VIDEO TUTORIAL:
ASSIGNMENT 001: ACTION SEQUENCE
Task: Create a 5 photo image with photos you have taken of the same character.
RESOURCES: Below you will find three tutorial videos, as well as the assignment sheet PDF which you can download to help you along.
Submit: A PSD and a PNG file 1080 image of your final work.
Follow proper naming convention: LAST NAME – FIRST NAME – ASSIGNMENT 001 ACTION SEQUENCE
TAKING PICTURES
EDITING PART 01:
EDITING PART 02:
EDITING PART 03:
MODULES 4 – 6 (INTERMEDIATE)
MODULE 04: DOUBLE EXPOSURE
In this learning, you will be able to utilize all the previous tools from MODULES 1 – 3, to create something called Double Exposure. A link below will take you to a website from Adobe that teaches the concepts in 1 min.
VIDEO TUTORIAL: Here is one possibility.
VIDEO TUTORIAL: Here is another example:
VIDEO TUTORIAL: Here is a 3rd example:
MODULE 05: TYPOGRAPHY
In this learning, you will be able to learn the typography tools. These tools will allow you to use TYPE for various effects such as the module below. Pick a fruit or vegetable and create your type on top of it.
VIDEO TUTORIAL: Learn about TYPE
VIDEO TUTORIAL: Here is a Second option !
MODULE 06: DISPERSSION
In this learning, you will be able to learn the gradient, and brush tools. This is the final lesson in the Photoshop course which will allow you to use almost all tools inside photoshop. You must download your very own image in high quality to make this effect.
VIDEO TUTORIAL: Learn how to…
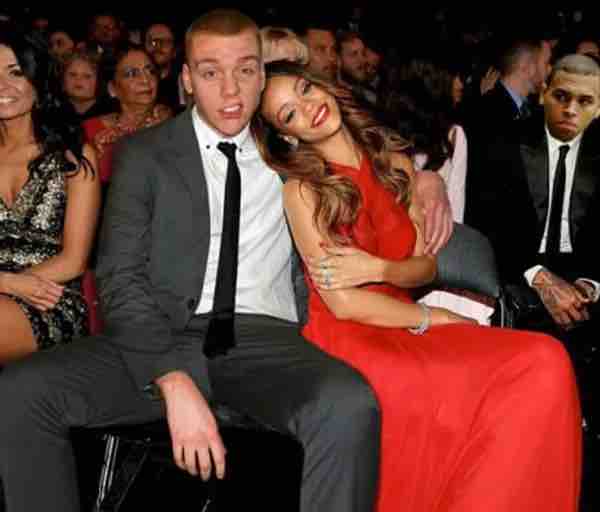
ASSIGNMENT 002: PHOTOBOMB
Haven’t you ever wanted to meet a celebrity?
Well, so did this guy! He decided that it would be easier just to Photoshop himself into photos with celebrities.
TO SEE MORE STUDENT EXAMPLES CLICK HERE
CHALLENGE:
For this project you will take a photo of yourself and merge it into another photo/ scene.
Requirements:
- you must have have an overlapping feature. (Example is your arm behind their back, their hair on your shoulder etc.)
- It must be very convincing so make sure you have correct shadows and you cut yourself out of your image well enough to make it realistic.
- This must be SCHOOL APPROPRIATE
- Hi quality image ONLY. Anything lower than 300 dpi or 1080 p will not be accepted.
TIPS:
- Adjust lighting, hue/saturation, colour balances etc to make the photo look more realistic.
- make sure to have your shadows correctly done.
- Colour correct and adjust those levels which will help smooth out the image.
RESOURCES:
Find Images for your project using one of the following websites:
*** Remember you can never scale an image up or it will become pixelated. You can scale images down if they are too large.***
Submit: A final PSD and a PNG file – Also please submit your original photo of your celebrity and the photo you took of yourself.
Follow proper naming convention: LAST NAME – FIRST NAME – ASSIGNMENT 002 PHOTOBOMB
ASSIGNMENT 003: DIGITAL PROD IMAGE
CHALLENGE:
Using Photoshop, you will be required to create one image consisting of ONE background image ,and ONE “object” from EACH object folder (total of 2 objects).
Here is the folder with the images to choose from:
Requirements:
- The final image is to be 10” x 8” @ 300 pixels per inch
- use layers and masking techniques to complete this challenge.
- Color corect, apply lighting to develop a cohesive image.
- Final file saved as PSD with all layers visible.
- Finel submission in PNG.
Submit: A final PSD and a PNG file – Also please submit your original photo of your celebrity and the photo you took of yourself.
Follow proper naming convention: LAST NAME – FIRST NAME – ASSIGNMENT 003 DIGITAL PROD IMAGE
