

THE CHALLENGE
One challenge students may face when creating a tiny house out of popsicle sticks is ensuring structural stability while working with such lightweight and small materials. Popsicle sticks, though sturdy in individual pieces, can easily bend or break if not properly supported. Students will need to carefully plan their designs, considering load distribution and balance to prevent their structures from collapsing. Additionally, creating intricate details like windows, doors, and roofing requires precise measurement and careful gluing, which can be tricky when working with such thin materials. Overcoming these obstacles will require creativity, patience, and strong problem-solving skills.
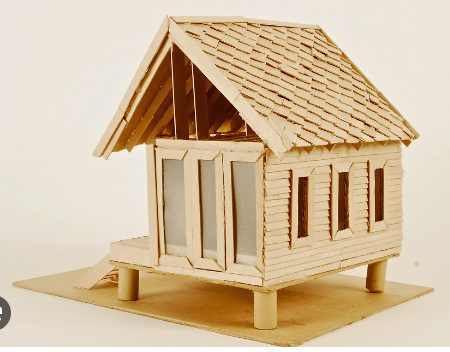
HERE IS MY FINISHED TINY HOME PROJECT

BEFORE YOU START
WATCH VIDEO BELOW
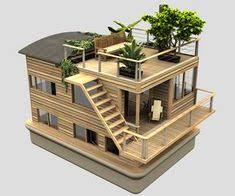
Look at this amazing Tiny House in the middle of the jungle.
PARAMETERS OF THE HOUSE:
Every house on a lot has parameters. These are the constraints/ parameters for your home build. You must follow this and keep it in mind as you follow the steps below:
MUST HAVES AND HAVE NOTS:
- It must have a SHED style Roof.
- It must only be one floor.
- It must have a door.
- It must have at least one window.
- It must have min four walls.
- It must NOT be bigger than 24cm X 24cm foot print/ layout.
- It must only use popsicle sticks provided and white school glue.
- It must NOT have more than 10% of the house in hot glue.
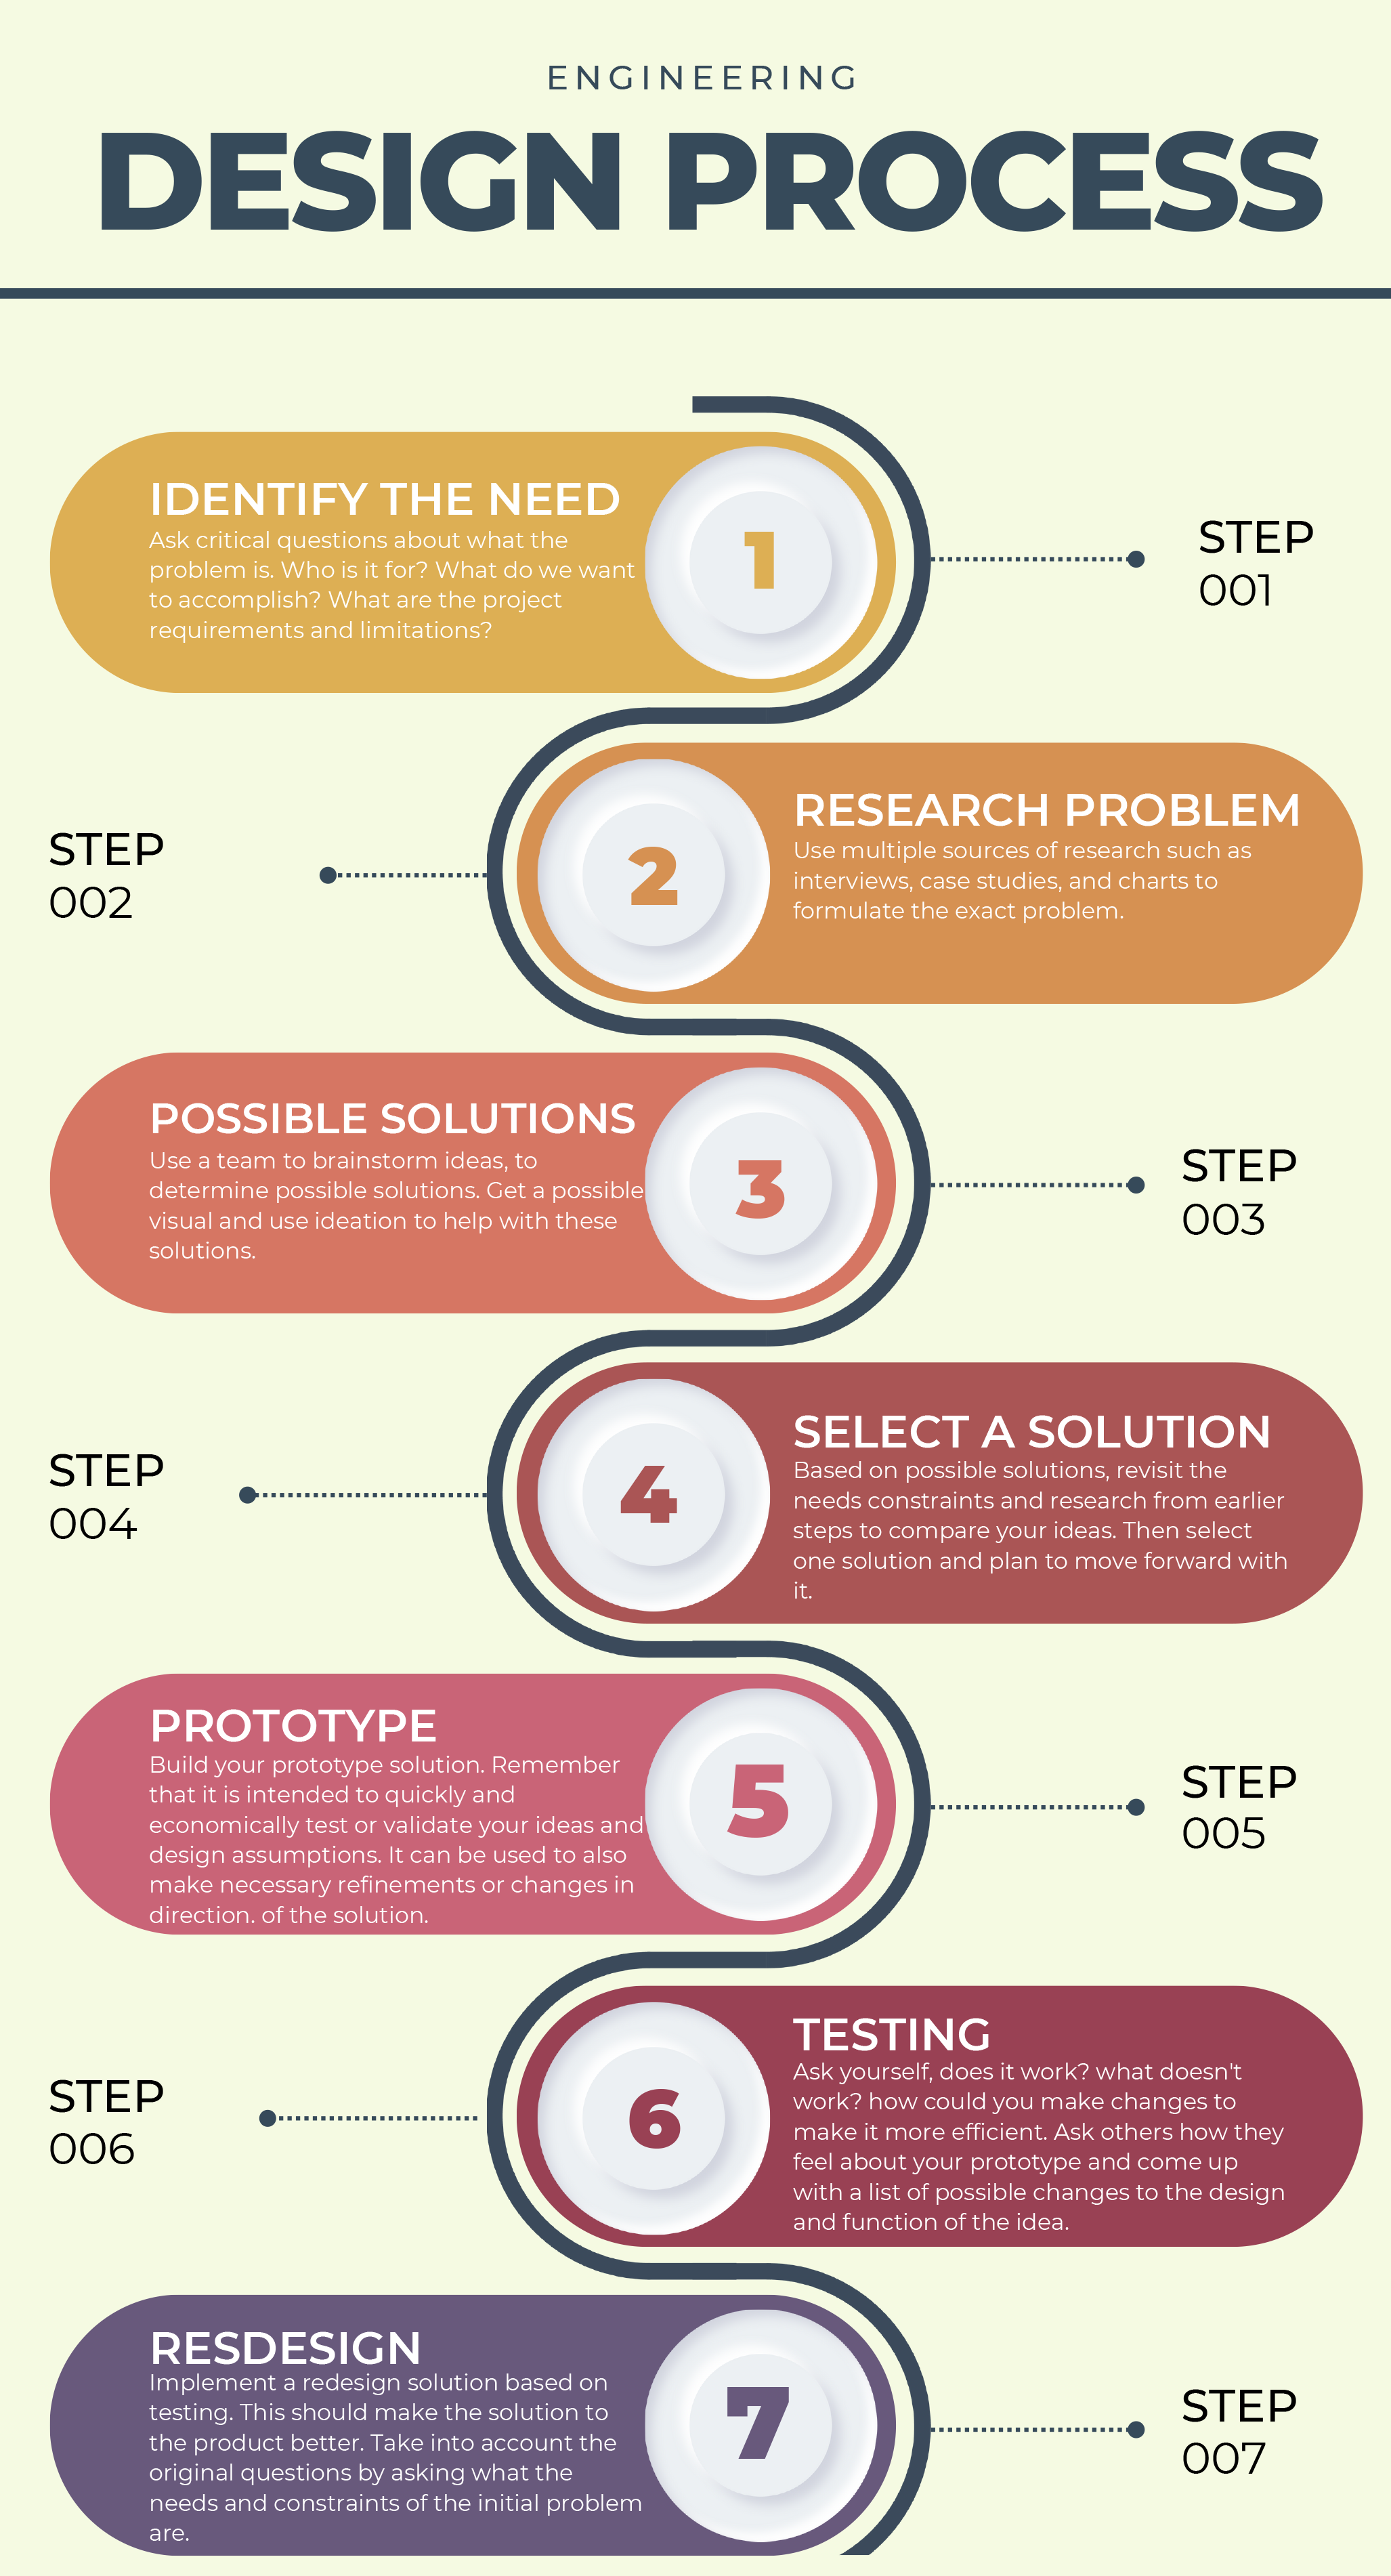
STEP 01: THE DESIGN PROCESS
Using Canva, create a infographic of the design process. SEE BELOW EXAMPLE:
USE CANVA to create this. You login using your School Email. Link is below
- Your infographic must be in color, have a good sense of understanding and display a min of 3 pictures.
- It must be in landscape size 8.5 X 11 inches.
- MAKE SURE YOU DO THIS IN LANDSCAPE AND NOT PORTRAIT !!! It has to fit in your google slides deck.
- You must have two slides in your slideshow that show the design process. That means split up your infographic that you will make in canva using two slides. Which means you will need two 11 X 8.5 canvas.
- Once you have completed your infographic in canva, save it as a JPEG and upload it to your Google Slides slideshow for the design process.
- You should now have a total of 3 slides. Slide 1 shows your name and project name, and the second and third slide shows your infographic for the design process.
- If you need help starting, see the tutorial below.
YOU ARE NOW READY TO MOVE ONTO STEP 2 BELOW:
STEP 02: ORTHOGRAPHIC
THERE ARE NO SLIDES TO ADD FOR THIS.
COMPLETE THE QUIZZES AND UNDERSTANDING OF THE ORTHOGRAPHIC VIEWS IN D2L/ GOOGLE CLASSROOM.
In this step, you must complete 4 quizzes for Orthographic views. You must also learn about orthographic views and then demonstrate this by drawing orthographic views in STEP 3. Don’t worry, you do not need to have any drawing skills for this.
STEP 03: RESEARCH TINY HOUSES
FORM a group of no less than 2 and no more than 5.
SLIDE 4 & 5 – Tiny house Research
The lesson below, sets up the groundwork to start our project, going over the importance of researching, analyzing and bringing-in influences prior to designing our conceptual vehicle that delivers groceries door to door.
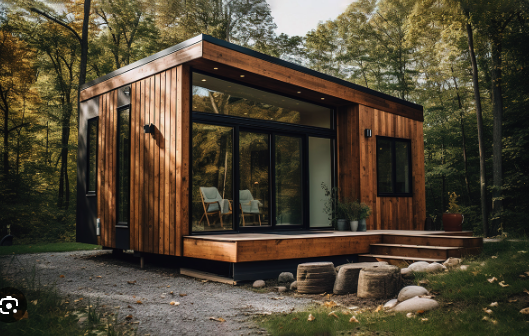
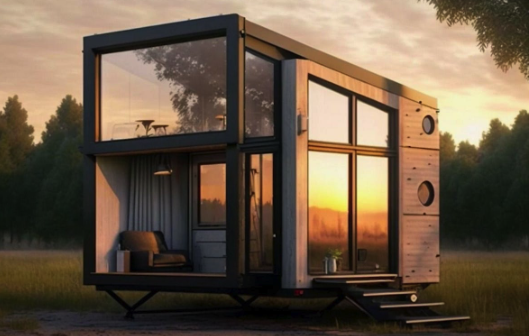
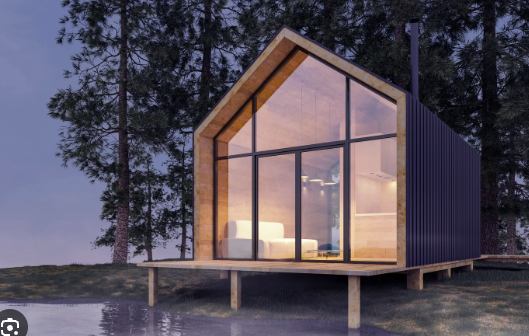
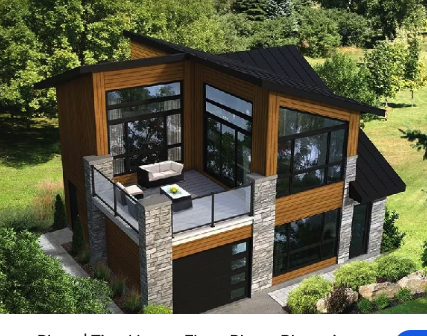
Instructions: You must go into google to gather all your images for your Tiny House. Search and scour the web to find Tiny house designs that you like. Place them onto 2 slides in your slide deck. Below are some design images I found that I want to consider using in my popsicle stick house:

STEP 04: PRACTICE DRAWING
SLIDE 6: ADD YOUR ORTHOGRAPHIC VIEWS FOR YOUR PENCIL SHARPENER.
Drawing Objects in Orthographic Views is a form of conveying analysis and design ideas, it is a fundamental skill set or a language of communication that most designers, architects and engineers use in their own professional practice- never too early to learn such a skill set.
In this step, you will draw a pencil sharpener.

SUBMIT: An image of a pencil sharpener with your orthographic drawing on slide 4 – See example Above. Tutorials are below by Mr. Balian
STEP 05: ROUGH DESIGN SKETCHES
INSTRUCTIONS: Everyone in your group should take a blank paper and start to make rough sketches. See my sketches below. These sketches will be used for STEP 6 when you make orthographic views before you start building.
Slide 7 must have:
- Names of group members:
- A bunch of drawings representing various design options. Make sure to get all the group members drawings onto slide 7.
- PICK THE BEST ONE or a combination and create your orthographic views in step 6.

MY EXAMPLE:
LOOK BELOW: I TOOK ONE OF MY DRAWINGS AND HAVE FLESHED IT OUT WITH ISOMETRIC VIEWS. NOTICE I DID 2 ISOMETRIC VIEWS.
STEP 06: ELEVATION VIEWS
Now that your design is approved, you can move onto your orthographic views of your Tiny Home. You will need to use this in order to make and manufacture your Tiny home from popsicle sticks.
Slide 8: MUST INCLUDE:
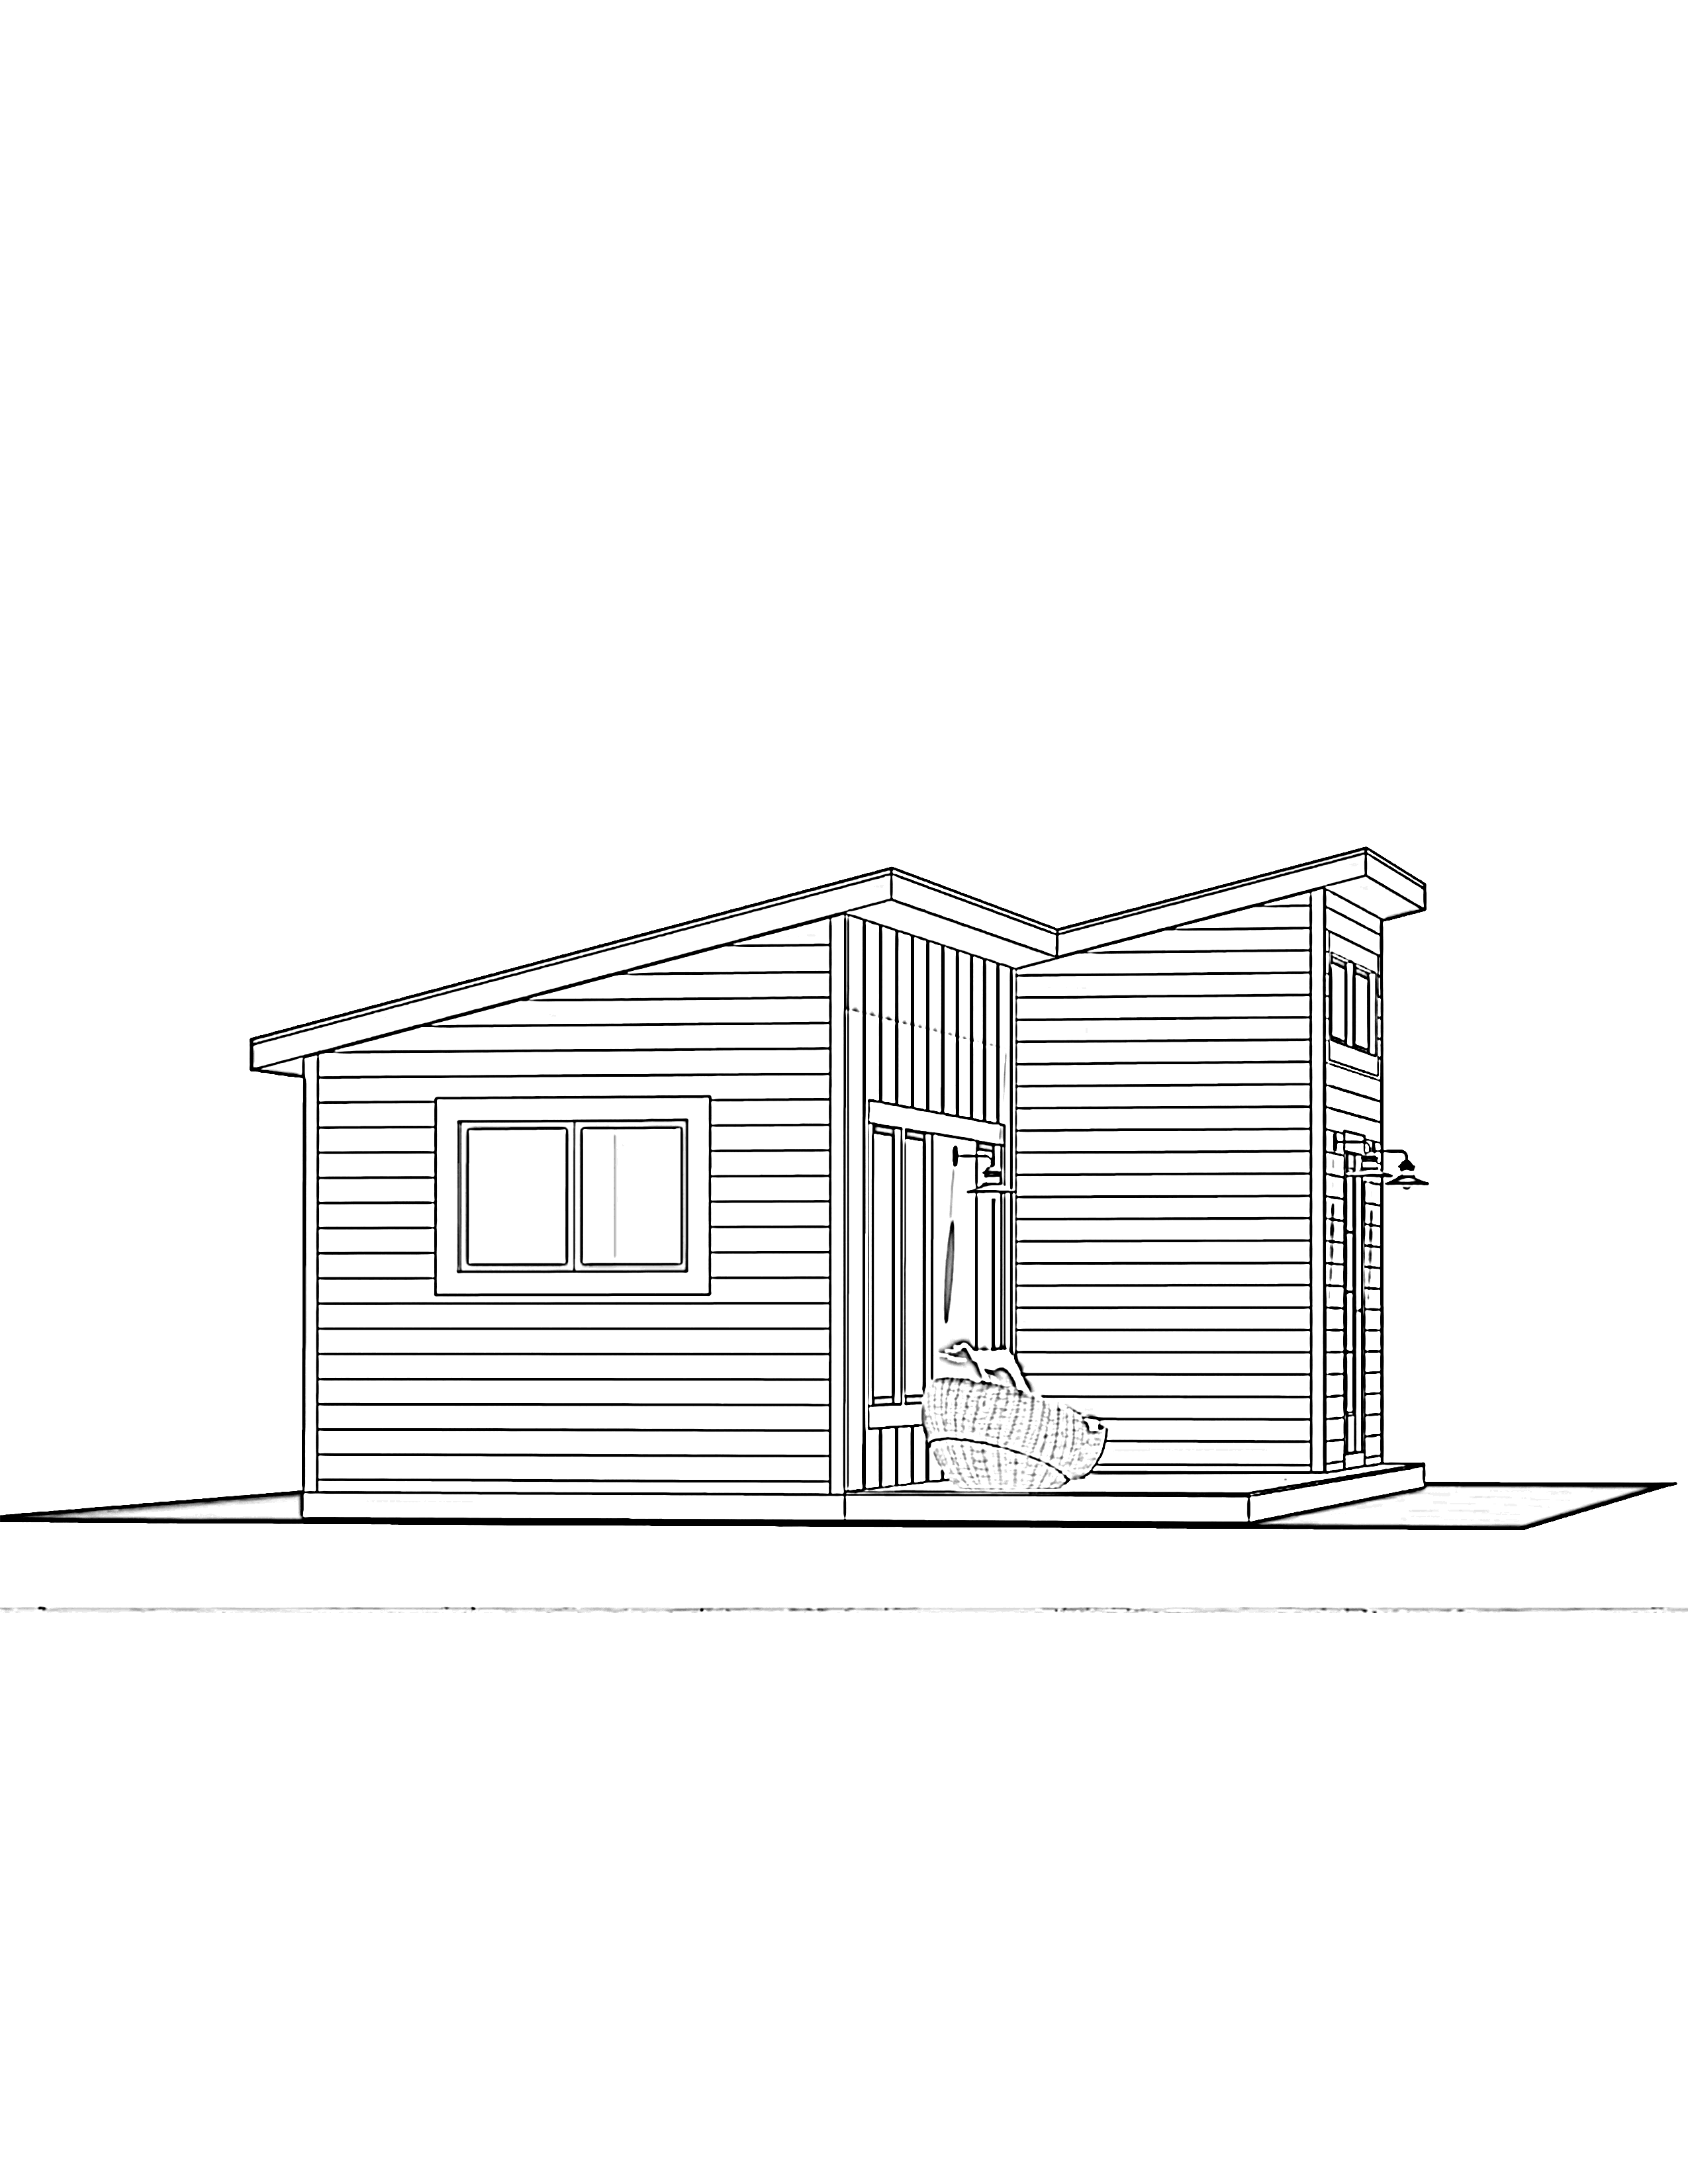
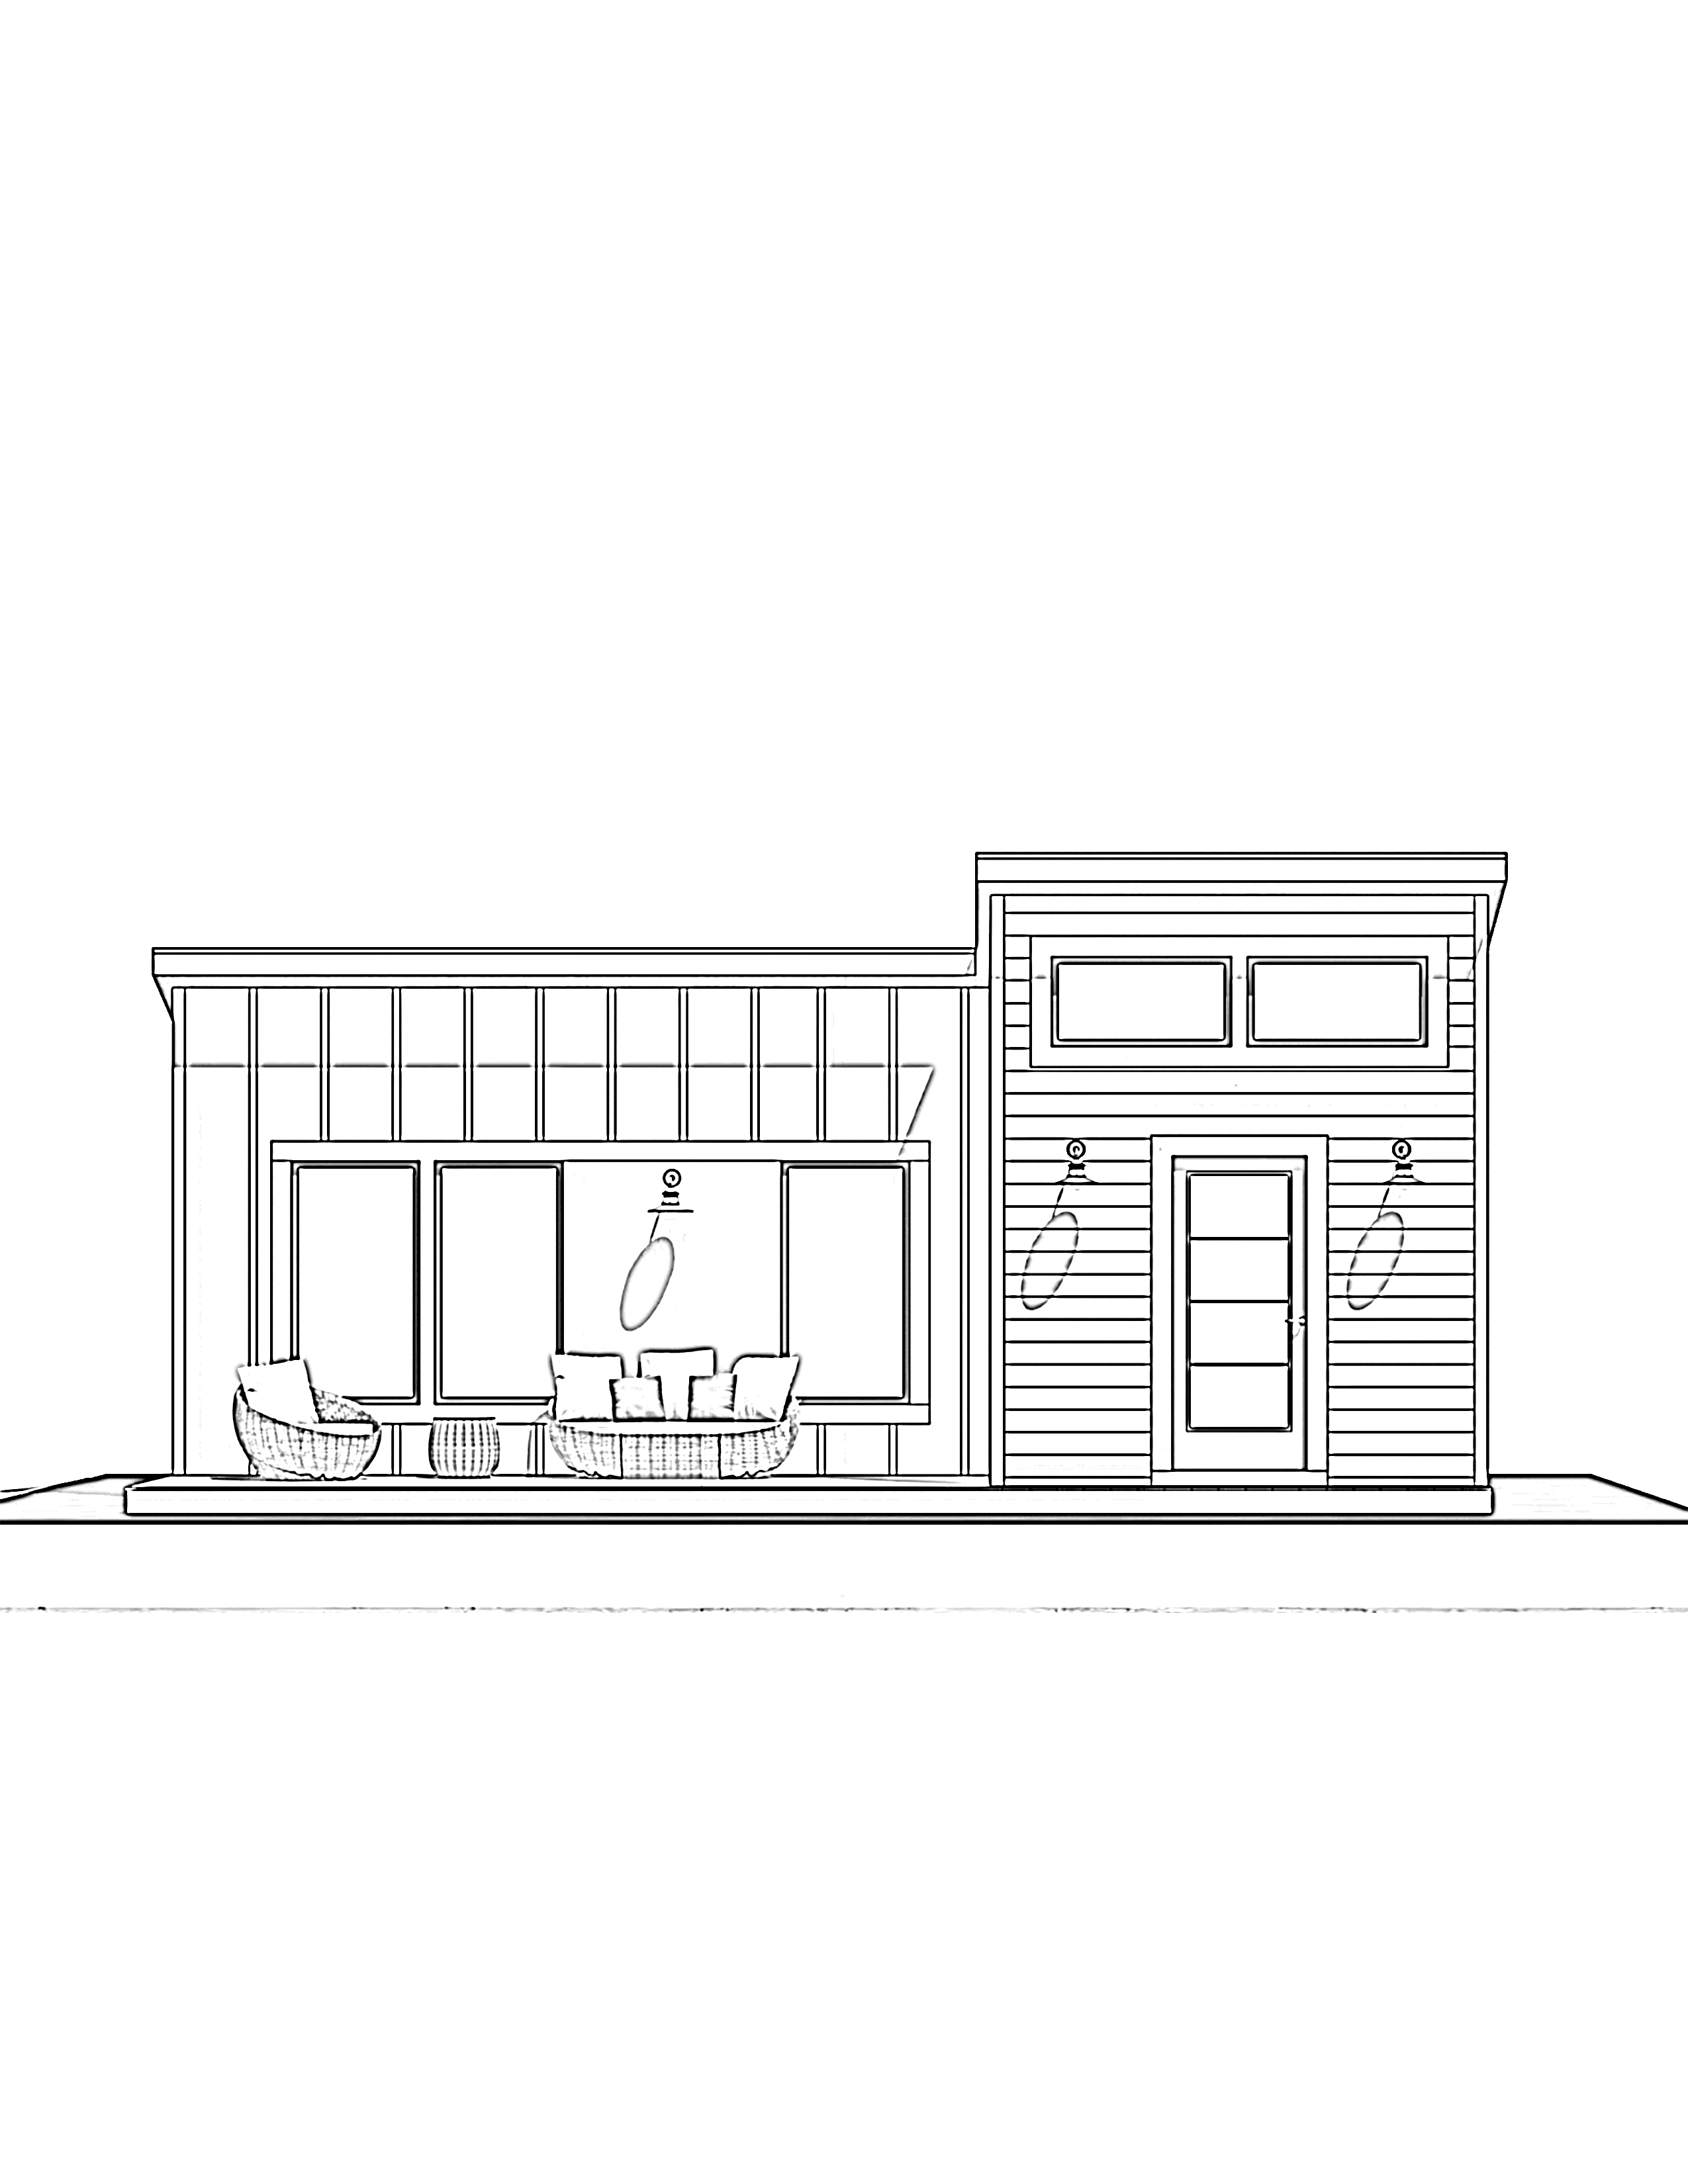
- Elevation Drawings (Orthographic Drawings) of your final house design with the correct labels. See below…
- Only 3 views are required: Front, Side, and 3/4
You can choose to do this digitally or by hand drawn.
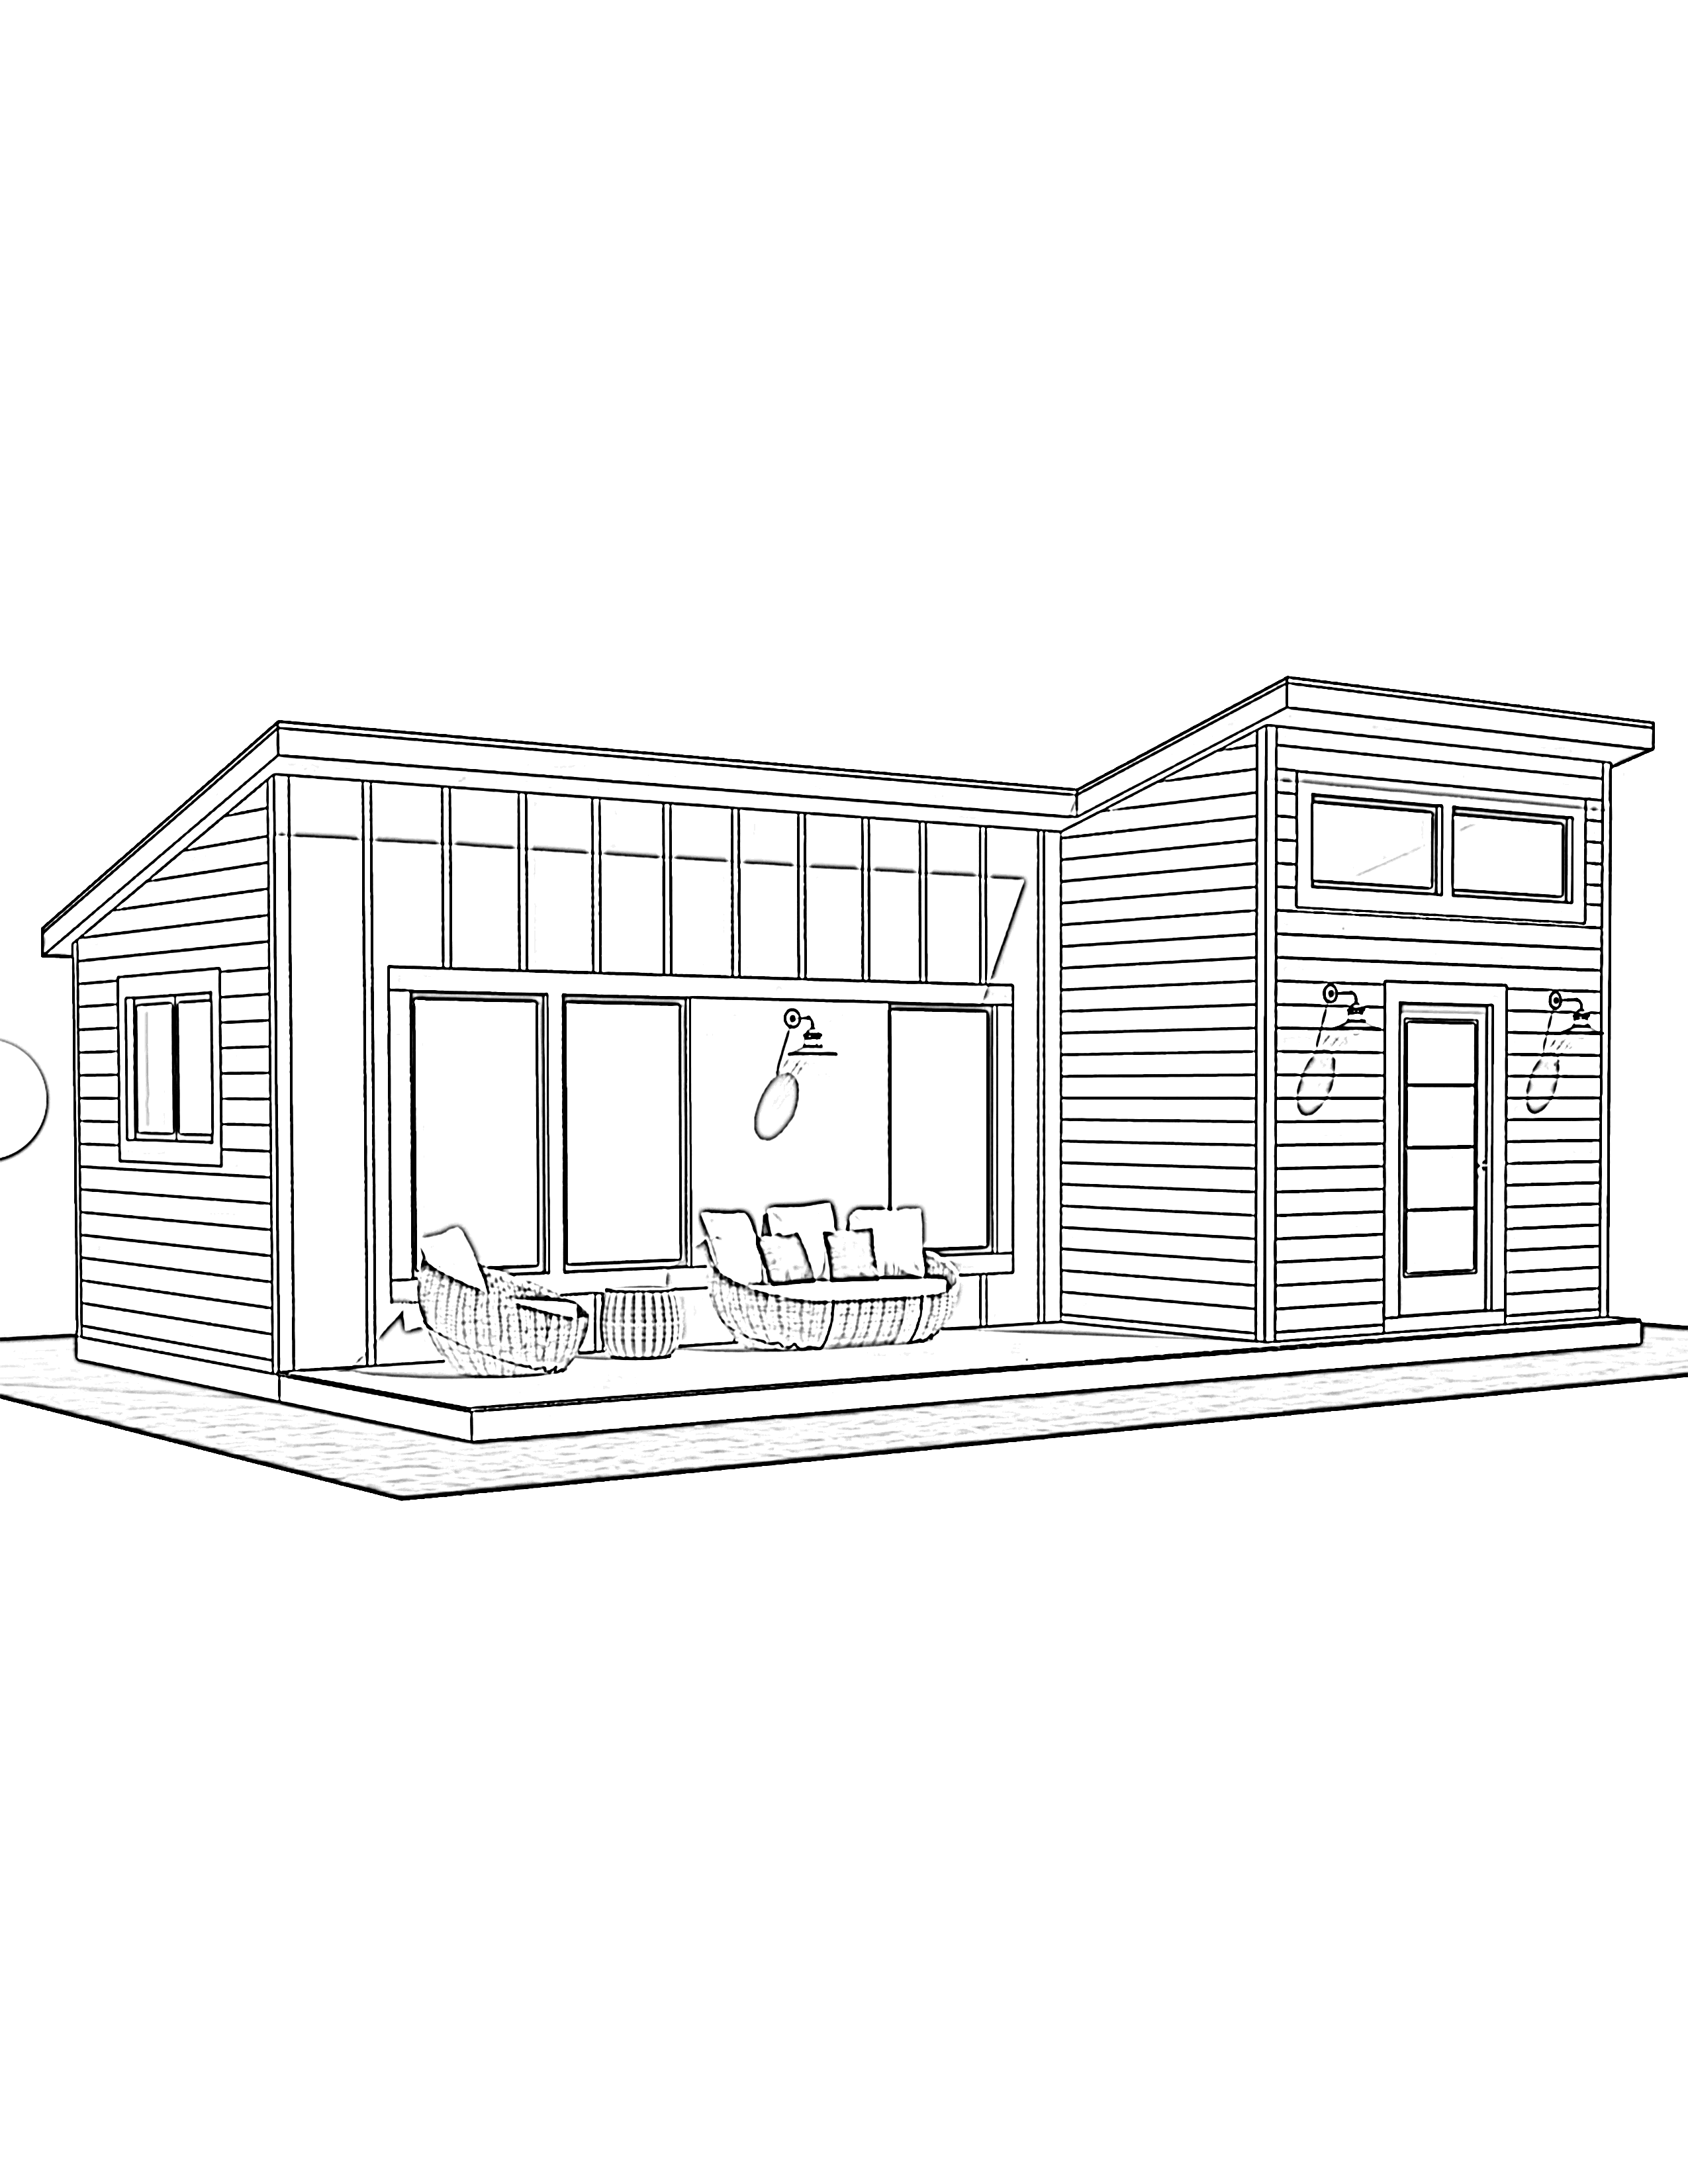
MY EXAMPLE:
LOOK BELOW: HERE BELOW IS MY EXAMPLE OF MY ORTHOGRAPHIC VIEWS FROM THE ISOMETRIC VIEW ABOVE.
STEP 07: EVALUATION
Complete your self and peer evaluation. Make sure to be fully honest about everything.
Tiny Popsicle House Rubric
| Criteria | Excellent (4) | Good (3) | Satisfactory (2) | Needs Improvement (1) |
|---|---|---|---|---|
| Design Process Infographic | Well-organized, creative, and includes 3+ images; fully meets size and format requirements | Clear design with required images and proper size/format | Lacks clarity or missing images; minor formatting issues | Missing key elements or improperly formatted |
| Orthographic Views | Clear and precise orthographic drawings for all views (front, side, 3/4) | Complete with minor inaccuracies | Missing one view or unclear drawing | Incomplete or inaccurate drawings |
| Research on Tiny Houses | Thorough research with relevant images; well-organized slides | Good research and relevant images | Some missing research or images | Limited research or unrelated images |
| Design Sketches & Elevations | Detailed sketches showing design variations; clear elevations | Adequate sketches with some detail | Incomplete or less detailed sketches | Sketches lacking detail or accuracy |
| Final Product & Presentation | Well-built house with attention to detail; professional slideshow with reflection | Good house construction and presentation | House lacks detail or presentation incomplete | Poor construction or unorganized presentation |
| Google Slides Presentation | Clear, engaging, and well-structured slides showcasing the entire design process and final product; visually appealing with minimal text and high-quality images | Complete slides, good structure, but lacks some engagement or clarity | Missing elements of the process or product; slides not visually consistent | Disorganized or unclear slides, with missing information |
| Peer and Self-Evaluation | Thoughtful and honest reflection | Good reflection with some areas for improvement | Incomplete or less reflective | Lacks effort or thought in evaluation |
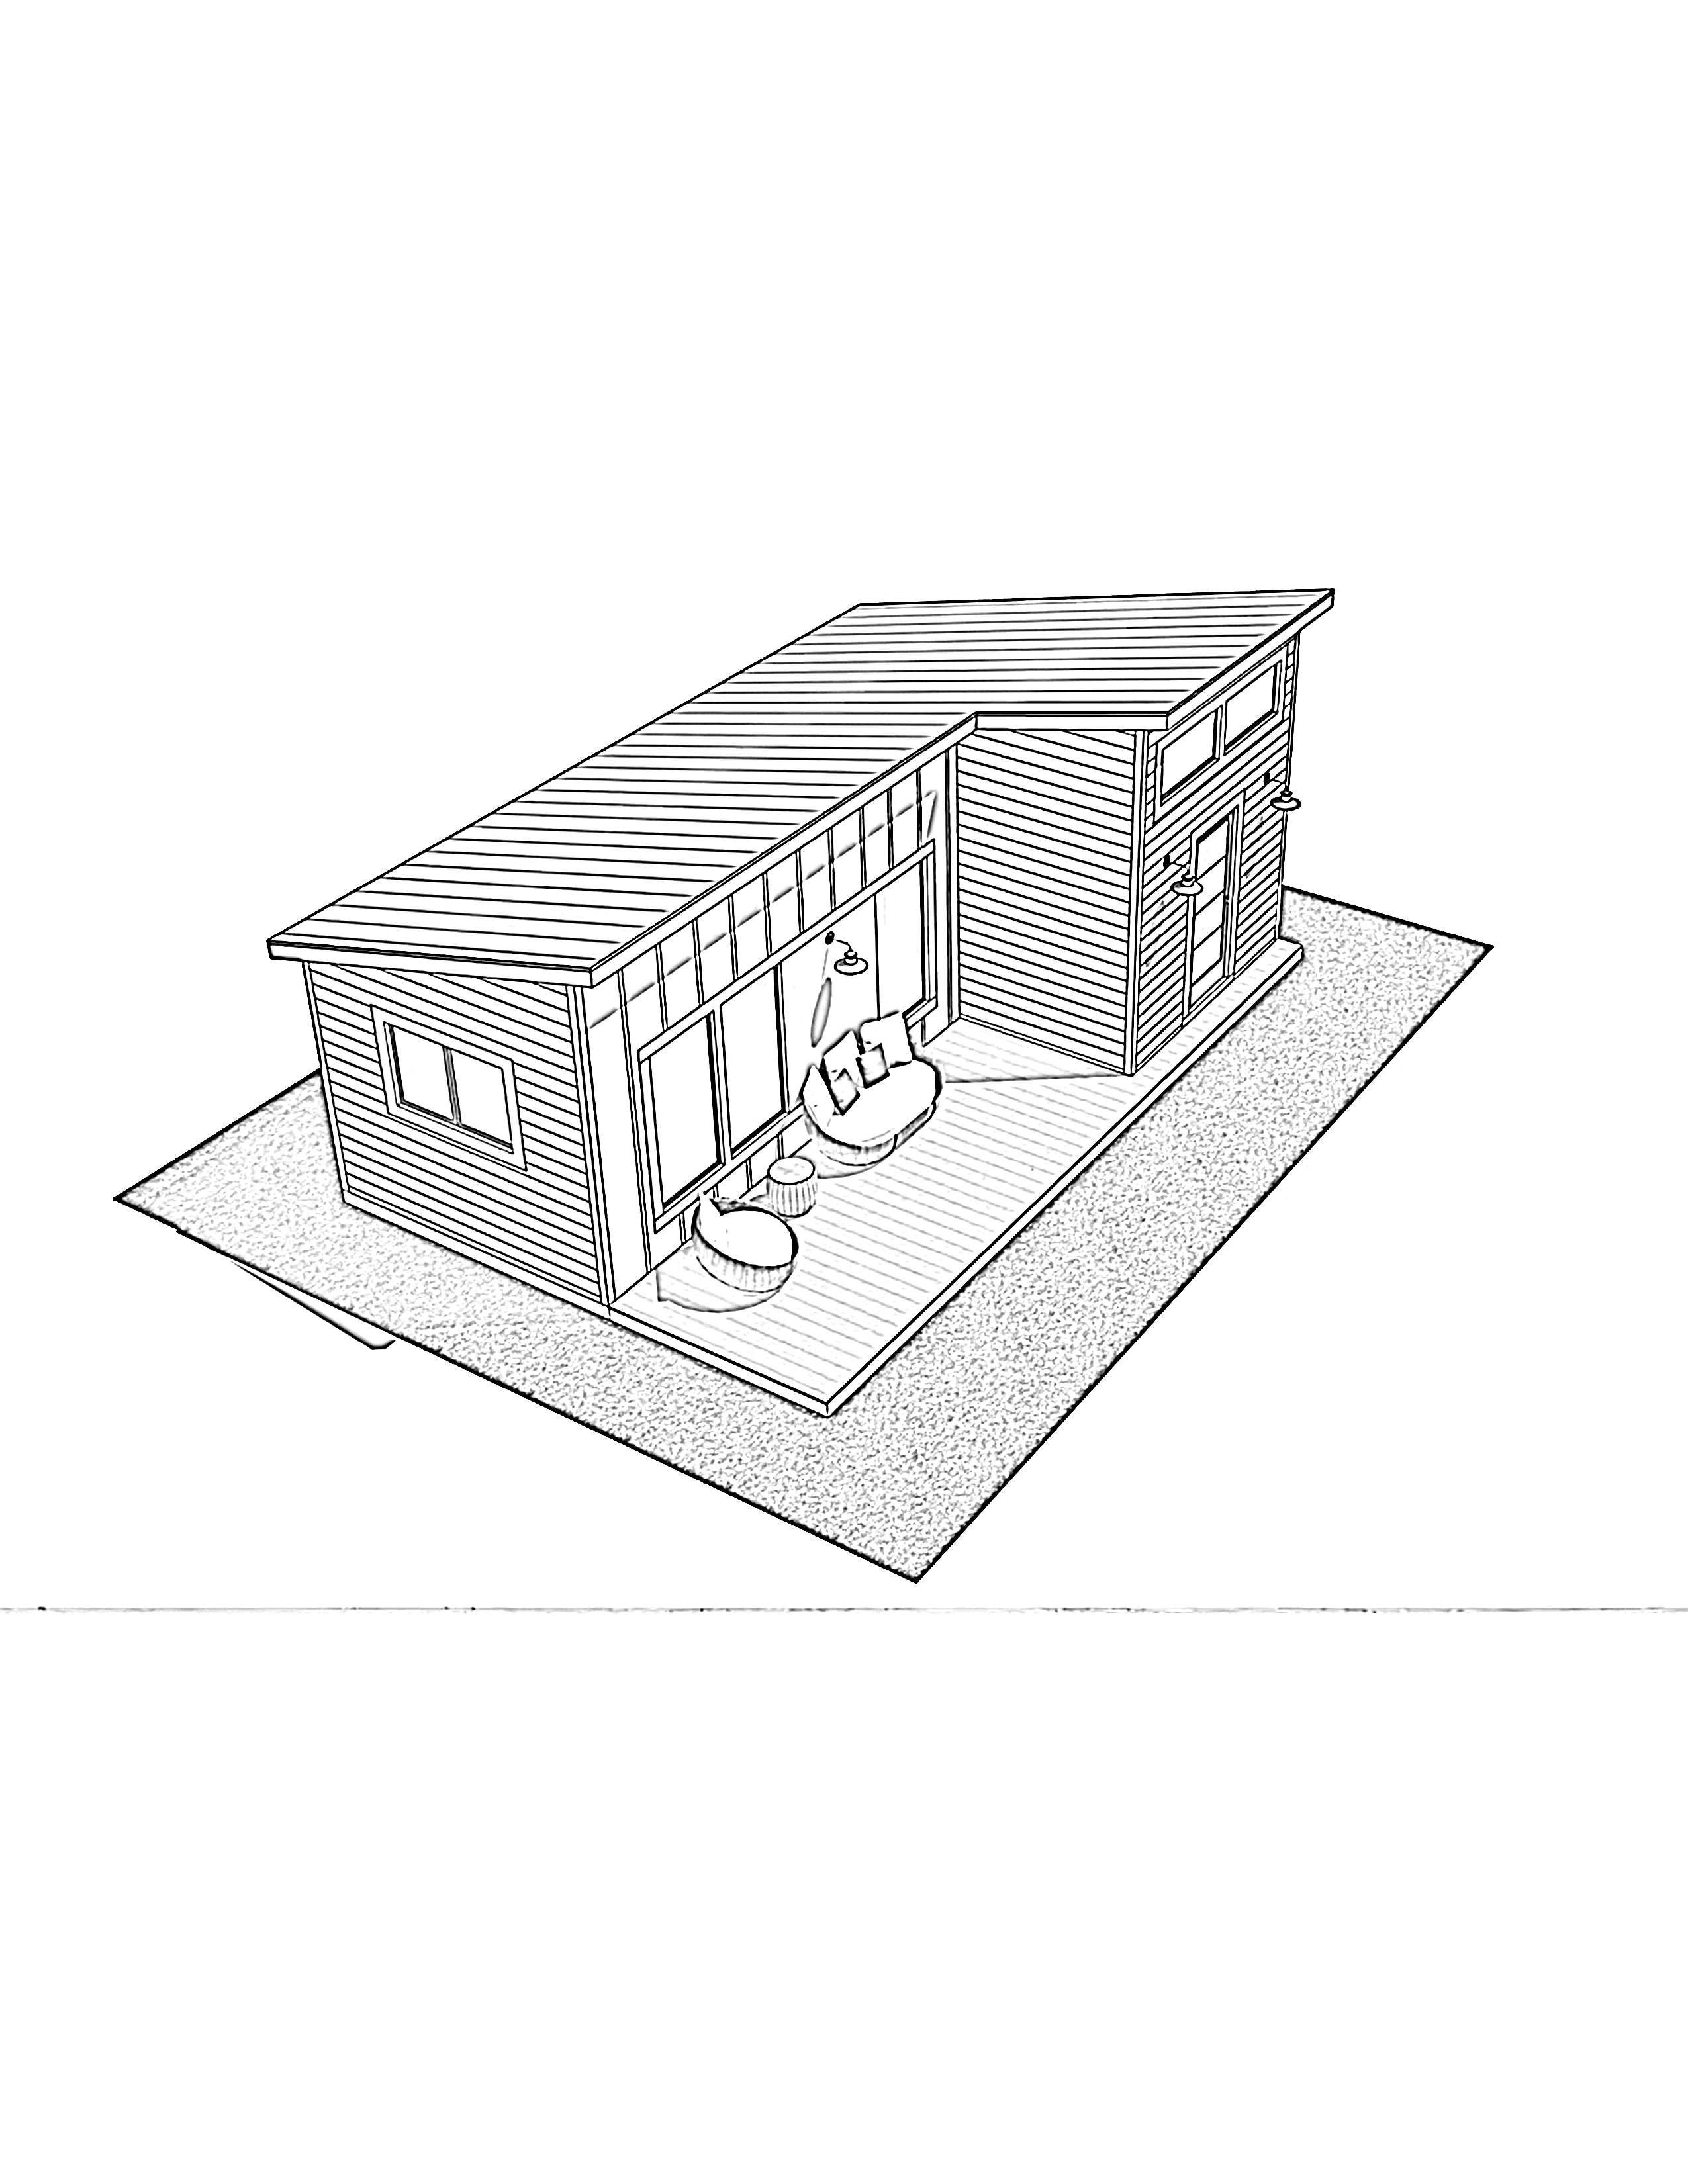
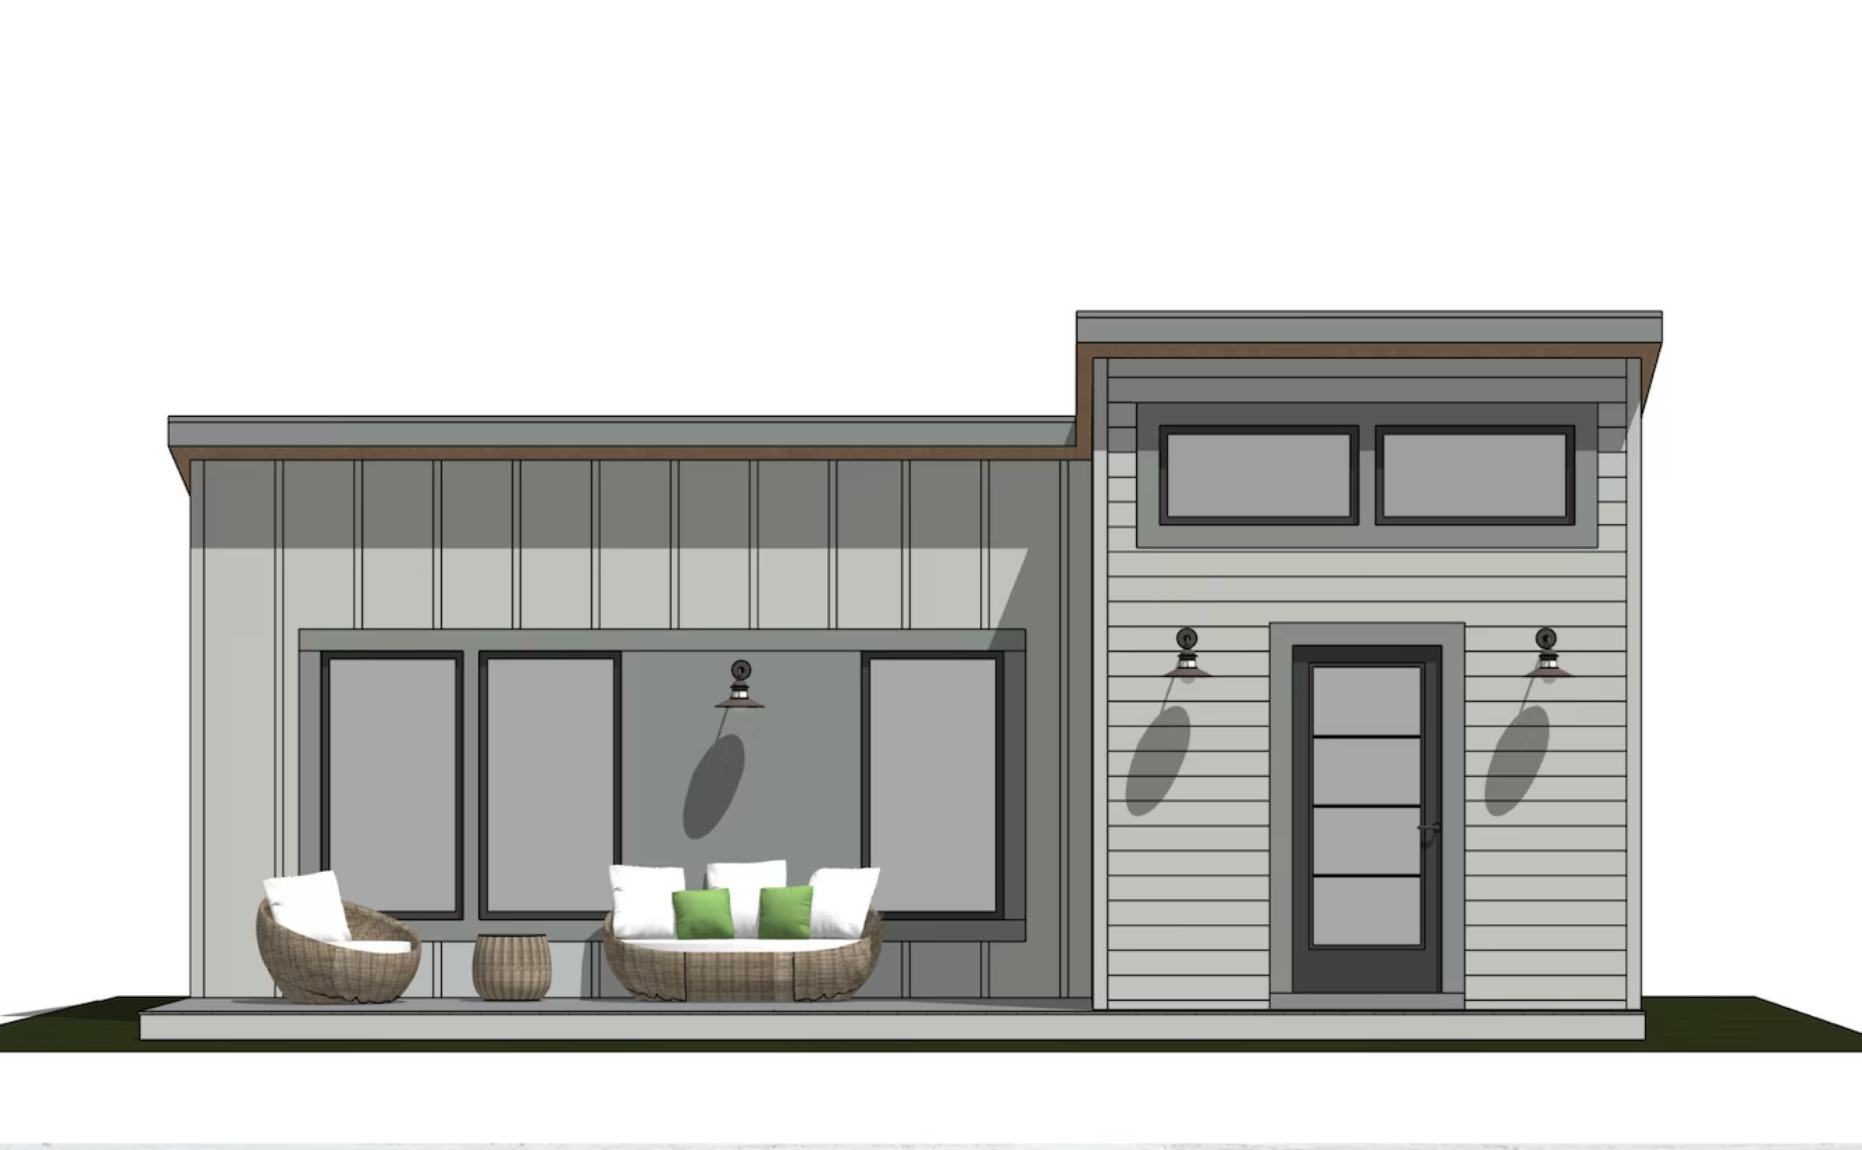
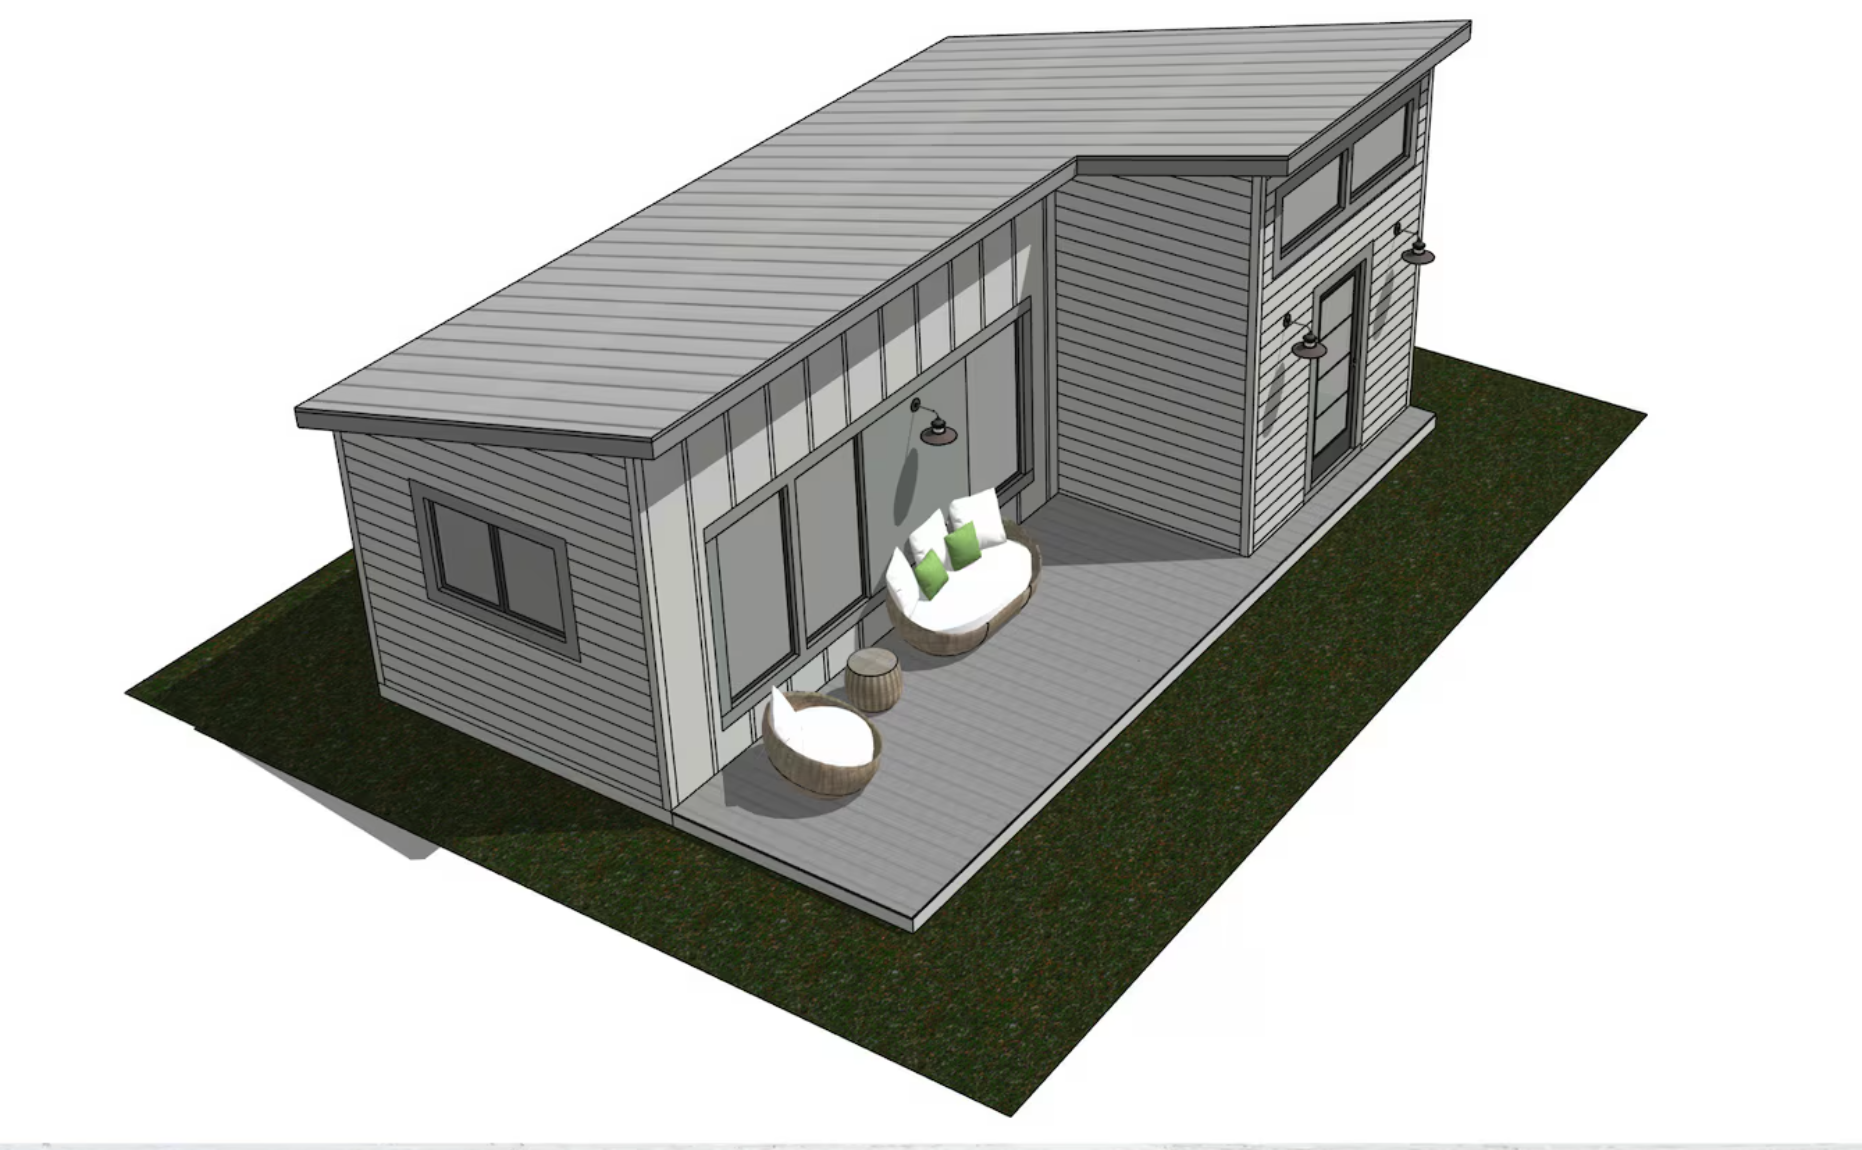
MY HOUSE IN 3D RENDER
NOTICE I ALSO DID A FLOOR PLAN TO HELP VISUALIZE THIS.


DELIVERABLES:
You must submit your GOOGLE SLIDE SHOW:
Google Slideshow BREAKDOWN:
Slide 1: TITLE and picture of your final house completed.
Slide 2 & 3: Design Process infographic from CANVA
Slide 4 & 5: Tiny house research
Slide 6: Pencil Sharpener Orthographic Views
Slide 7: Design of various tiny homes
Slide 8: Orthographic Views on Final design
Slide 9: Detailed Images of your final product.
Slide 10: Thank you slide and a bit about the process (When creating a tiny popsicle stick house, I start by designing orthographic drawings to plan the dimensions and structure. I use these drawings to guide me in cutting and arranging the popsicle sticks. I build the base and walls, gluing the sticks together with regular glue and clamping them until they dry. I use minimal hot glue for extra reinforcement in key joints, like the corners. By following my drawings closely, I ensure the house comes together accurately, finishing with the roof by angling the sticks as planned.)
